That is the question I asked myself
while reading various raytracing blogs and forums a while ago (they love
using acronyms). I can tell you it’s not a long-forgotten brother
of a former president, and not a fancy cable for your hi-def TV.
HDR stands for High Dynamic Range. In my previous blog post, I
combined two things one wouldn’t think would go together – substitute
teaching and raytracing. This time I’m combining HDR photography
and raytracing.
HDR Versus LDR / SDR
Most photos or raytracing output would
be considered Low Dynamic Range (LDR) (also known as Standard Dynamic
Range (SDR)). This is because most image formats are based on
24-bit (3 byte) RGB color triples. Each color component (red,
green, and blue) is 1 byte which means it can store an integer value
between 0 and 255 (0, 1, 2, … 255). Some image formats use 32 bits
(4 bytes) – the fourth byte being either unused padding or an alpha
channel used for transparency; either way, it doesn’t effect the stored
color. HDR image formats typically use floating point RGB color
triples. These values can range from smaller than you can imagine
to larger than you can imagine (I won’t mention specific ranges because
that would depend on the format used). Overly dark images in an
HDR format would contain many pixels with a small RGB triple, for
example (0.000561, 0.000106, 0.0002). This value would be (0, 0,
0) in an integer RGB format, which would be black with information
lost. In the case of overly bright images in an HDR format, there
might be a lot of large RGB triples, like for example, (26010.0125,
257.1, 280.6). This value would be (255, 255, 255) in an integer
RGB format (since without any special processing, values are “clamped”
to a range of 0 to 255), which would be white with a definite
information loss – the HDR version is red. You might say “Why not
just scale the values to fit between 0 and 255?”. In some cases
that would work (but information / precision would be lost).
However, what if the image contains both super light and super dark
areas? HDR images can store “a greater dynamic range between the
lightest and darkest areas” [Wikipedia].
HDR Used in Raytracing
 | |
| Raytraced scene with super bright lights saved with normal LDR format. |
 |
| Raytraced scene with super bright lights tone mapped from an HDR image. |
Loading HDR images in a raytracer is not
necessarily a no-brainer. Loading would mostly be used for what’s
called “texture mapping” – a method of applying a texture to an
object. The texture routines could also be used for what’s called
“environment mapping” – a method of easily applying an environment (that
an object is in) without having to actually create the
environment. I chose to support the “PFM” format for
loading. Examples of environment mapping appear below. In
one of the pictures there are three spheres – two glass (showing
refraction) and one silver (showing reflection). The other picture
shows two colored reflective spheres. Of course, it doesn’t have
to be spheres, it can be any objects. I used spheres here to show
that the environment really does completely surround the objects.
The HDR environment maps I used are freely available and can be
downloaded at http://www.hdrlabs.com/sibl/archive.html
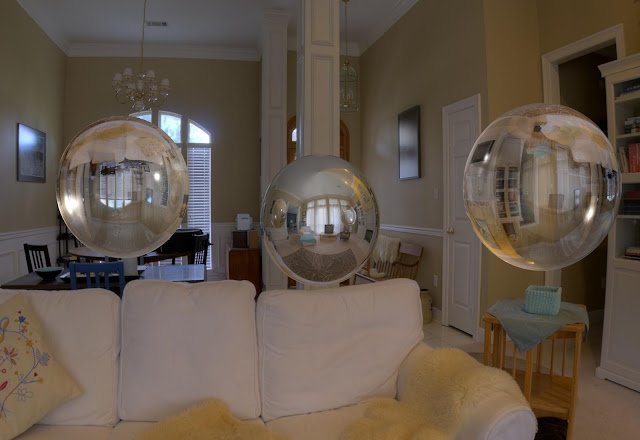 |
| A raytraced environment mapping example with both glass and silver balls. |
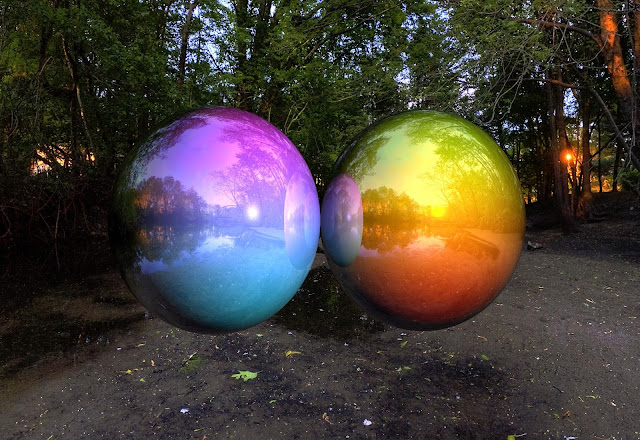 |
| A raytraced environment mapping example with colored reflective balls. |
HDR Used in Photography
This application of HDR will probably be more interesting to most people, but also more controversial. Mostly, people either love or hate HDR photography. Some people love it, then hate it. It tends to depend on whether you’re into realism or artistic manipulation. I guess my preference would be to have both versions available.
Some digital cameras can use an HDR format, most can’t. Also. some digital cameras have features like “auto exposure bracketing (AEB)”. Neither of these is necessary to do HDR photography (but they are helpful). Exposure bracketing is a technique of taking many photos of the same scene with different exposures. The resulting images can be combined to form an HDR image. Usually, one photo is taken with the desired (or close to the desired) exposure, at least one photo is taken darker (under-exposed), and at least one photo is taken lighter (over-exposed). Care should be taken to ensure the scene doesn’t change while the set of photos are taken, since the photos need to be combined. You can change the exposure by changing the shutter speed or ISO speed or aperture depending on what controls your camera has. The easiest way is to use EV compensation if your camera has that setting. Typically, -2 EV, 0 EV, and +2 EV would be used, but -1, 0, and +1 and even -2, -1, 0, +1, +2 (5 photos instead of 3) are good values as well. Cheaper cameras might only have two exposure settings. With these cameras, you could either try to do it with only two images, or you could change the light level of the scene (different lights, etc.). Auto exposure bracketing will automatically do all the exposure bracketing for you.
Once you have the bracketed images, you need to combine them using software. One program which will do this nicely is HDRsoft’s Photomatix Pro. A free trial version is available. Luminance HDR and picturenaut are free programs which can also be used (with less satisfactory results, in my opinion). Once the images have been combined into an HDR image, generally tone mapping should be applied, especially if an LDR image is desired (in the end). The myriad of tone mapping operations are too vast to cover in this blog posting, so my advice is to just experiment with different settings. There usually is an “Undo” function, but if not, you could always start over.
To illustrate what can be done with HDR photography, I’ve done some test images using photos of Maryland’s Cove Point Lighthouse (which are copyrighted by Ferrell McCollough and provided by HDRSoft (permission was granted to use these photos)). The three photos from their set are of normal exposure, over-exposed, and under-exposed. The results tend to be somewhat surreal. Furthermore, to really test what can be done, I also tried using just two source images: under-exposed and over-exposed. Everyone can agree neither of the two source images are very desirable as is (due to the exposure settings), but when combined, the result is much better. Even HDR photography haters would have to agree.
To see some remarkable examples of HDR photography, do an internet search for HDR photography. There are quite a few pages with titles like “50 best HDR photos” or “50 Incredible Examples of HDR Photography”.
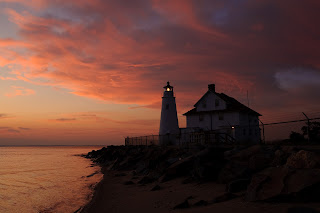 |
| Lighthouse underexposed source photo (copyright Ferrell McCollough and provided by HDRSoft) |
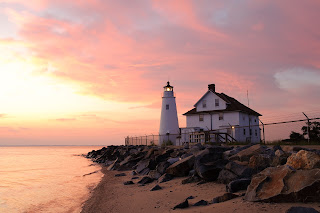 |
| Lighthouse normal source photo (copyright Ferrell McCollough and provided by HDRSoft) |
 |
| Lighthouse overexposed source photo (copyright Ferrell McCollough and provided by HDRSoft) |
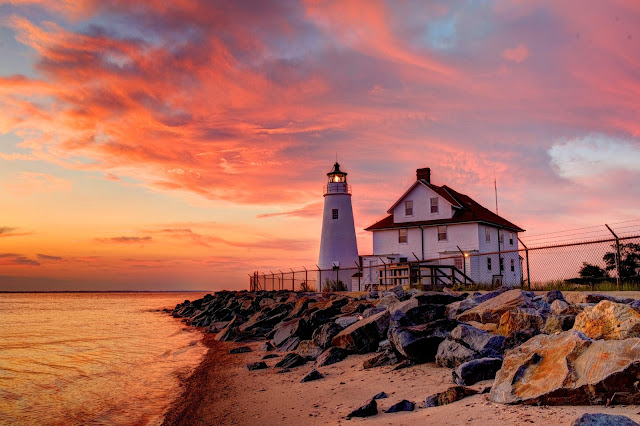 |
| Lighthouse processed (fused) using Ferrell McCollough’s normal, over, and under photos. |
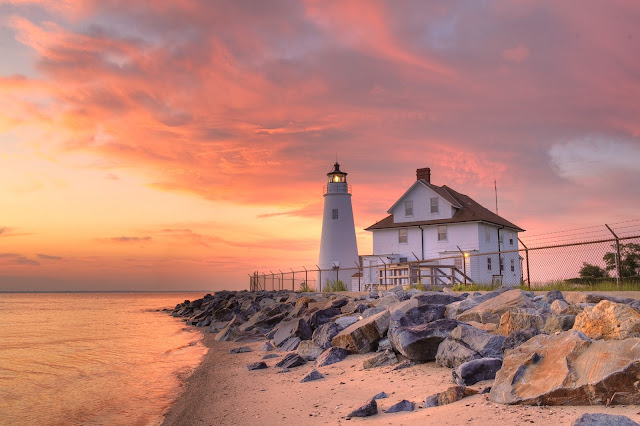 |
| Lighthouse processed (tonemapped) using Ferrell McCollough’s normal, over, and under photos. |
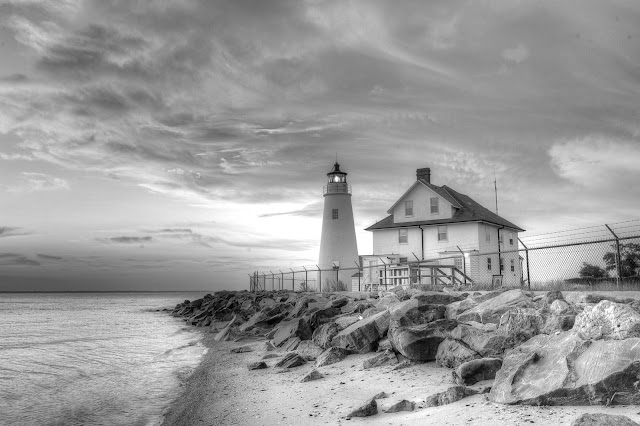 |
| Lighthouse processed (tonemapped/greyscale) using Ferrell McCollough’s normal, over, and under photos. |
 |
| Lighthouse processed (fused) using Ferrell McCollough’s over and under photos. |
Final Thoughts
One interesting application of HDR images is web-based viewers which allow you to interactively change the exposure and apply tone mapping. One such webpage is at:
http://hdrlabs.com/gallery/realhdr/
Two more webpages are at:
http://pages.bangor.ac.uk/~eesa0c/local_area/local_area.html and http://www.panomagic.eu/hdrtest/
Using a program called pfsouthdrhtml (part of the pfstools package), you can create webpages like these (but without the tone mapping selections of the first webpage). picturenaut can also be used. Also, a nice tutorial which goes into more detail of creating an HDR photo (warning, though, his version of Photomatix is different than mine and perhaps yours, so some interpretation is necessary) is at: http://marcmantha.com/HDR/Home_Of_Worldwide_HDR.html
Well, happy experimenting!
I created a video showing all of the HDR images in HDRLabs' sibl archive mentioned earlier (in the raytracing/environment mapping section). It's a 360 degree vr video, so your browser and/or hardware will need to be capable of viewing it correctly.